 Arnel Hasanovic- Upsplash
So, you created your blog and launched it. Great! You’re probably getting ready to post your first piece on your blog, BUT there are some steps you should take before jumping right in. Blogging can be easy if you plan ahead and make a strategy for yourself sooner rather than later.
1. Have at least one social media account.
This should probably be the next step after you create and launch your blog. You should have at least ONE social media platform so that your viewers can find and follow you. We are getting into an era where it is almost impossible to exist online without a social media.
Yes, folks have survived in the past with just a website when people actually read more books and literary things, but each new generation will deepen their roots into social media as time goes on. Trust me, you don’t really have a choice here.
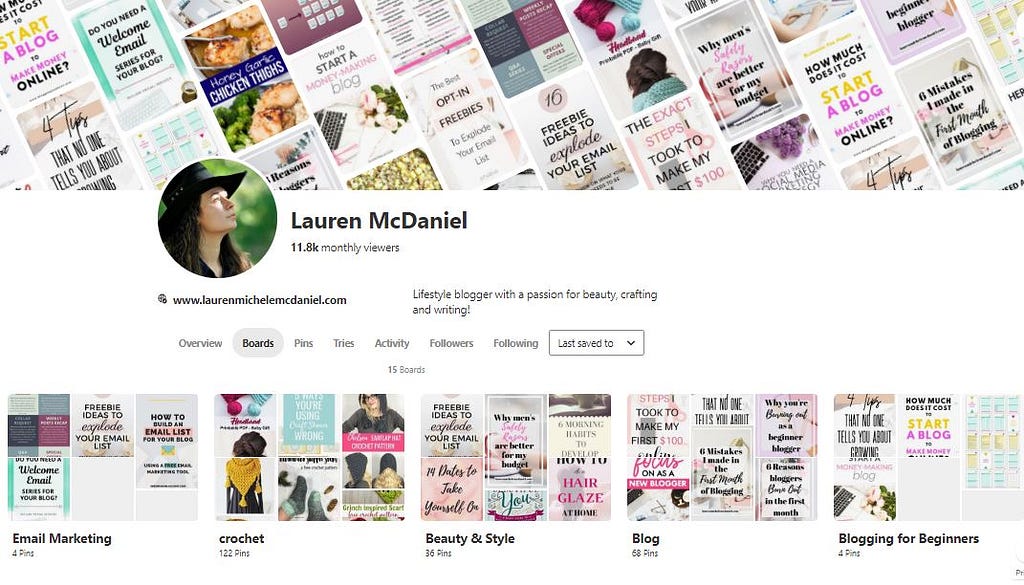
You don’t need to create an account for ALL the social media platforms, though. Just start with one. I’d recommend starting with Pinterest or Facebook. Personally, I would choose Pinterest because it’s far more versatile and works better for bloggers in particular.
Facebook is fine, but it feels like it might be slowly phasing out due to the over popularity of other social medias like Snapchat and Tik Tok (whatever that is).
The great thing about both Pinterest and Facebook is you can create a business profile and analyze the insights you get from your audience and track your progress and your blog grows.
Again, you should have your social media account before you launch your website, but if you haven’t done this yet, do it before you write your first blog post BECAUSE the next thing you’re gonna do after you post one is announce it on your social media! This is the easiest and quickest way to get your content in front of your viewers as soon as you publish that first post.
2. Have Canva/Photoshop ready to create beautiful graphics for your social media accounts.
The best way to prepare your graphic content that will showcase your beautiful blog posts is by using a graphic designing engine like Photoshop or Canva.
Photoshop is great for those experienced designers who already know what they’re doing. It is NOT free.
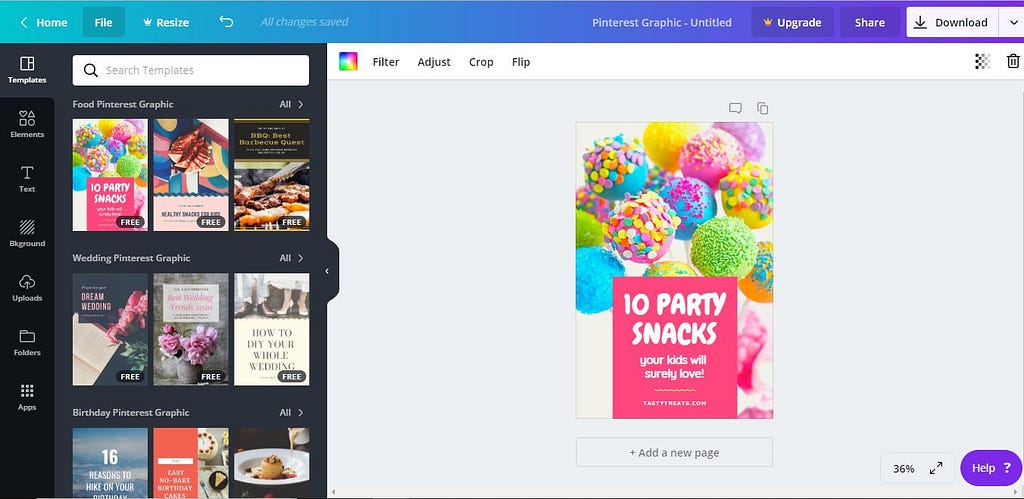
Canva is a free designing engine you can use to create beautiful banners and posters for your social media accounts to advertise your blogging content. It even has pre-made designs for every social media account you have to save you time and energy!
Creating an account with Canva is super easy with walkthroughs and tips on creating professional-looking designs to compliment your website content.
3. Make sure you have chosen your niche and stick to it. Make sure your blog post is relevant to your niche.
A website niche is an overall theme that your website revolves around. There are millions of niches to chose from, but the most important thing to remember to make your niche your own. If you want your niche to be about travel, yet you do not travel, that’s probably not a good niche for you.
A good niche is one about which you have tons of knowledge, and would feel comfortable teaching others.
It’s a good idea to chose your niche before you launch your first blog post because your audience needs to know the purpose of your website as soon as they land on the homepage. This is called targeting your audience. If your audience knows exactly what you will provide on your website, your loyal readers will keep coming back.
If you launch your blog to revolve around travel, but most of your content is about food and parenting, it will confuse your readers. Once you chose your niche, make sure all the content you write for your blog can fit within that niche.
4. Don’t worry too much about the nitty-gritty.
Once you have a website, it will be easy to spend long hours tweaking it, exploring different themes and experimenting with plugins. DON’T let yourself get carried away with fine-tuning your website! That’s how you burn out.
You will inevitably change it later on as you gain more and more knowledge about how to run a blog like a well-oiled machine. We all do. We learn. We tweak. We apply our new knowledge. Repeat.
Make it as simple for yourself as possible at the beginning and focus on getting your content out. The way you handle your first 2–3 months blogging will define your success for the rest of that first year.
Get what you need to have on your website up as quick as possible, and worry about making it pretty later.
5. Create a blog posting strategy/schedule.
It’s important to create a blog posting strategy before you dive in and start posting. Take it from all the bloggers who have come before me, they will all say the same thing: get ahead at the beginning.
What we mean by that is you should write have at least 5–7 blog posts ready to publish as soon as you launch your website. This will help your audience get a real feel of who you are and our blog’s purpose right at the beginning of your website going live. They won’t have to tune in every week and wait for you to develop a strategy.
THEN, you should also have another 5–7 blog posts ready to be scheduled the first 5–7 weeks after your blog launch.
It’s a good idea to use a scheduling engine for your website that will automatically publish your posts once a week so you don’t have to go in and do it every time. If you chose a good host for your website like Bluehost, you can auto-schedule your posts from within your WordPress.
If you don’t have an automatic scheduling engine built in to your website, CoSchedule is a great software that will not only publish your blog posts for you, but also your social media posts!
6. Outline your blog post before you start writing.
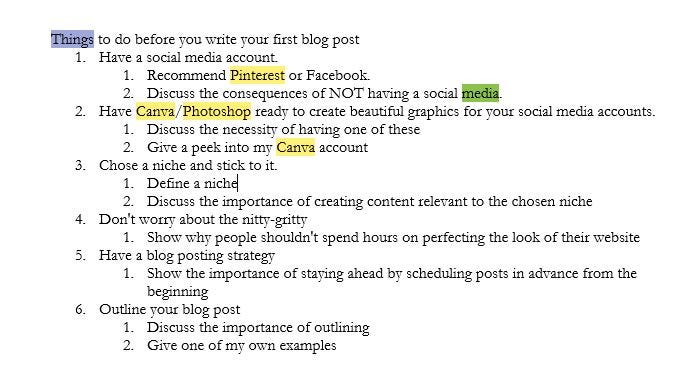
The best way to write engaging blog posts is the outline them FIRST. When you outline your blog post, you are forced to stay on topic the entire length of the article. It’s also a good idea to KEEP your topic points of that outline in your blog post. For example, when I sat down to write this post, I came up with the topic:
What do my readers need to know how to do before they even post their first blog post?
Then, I came up with the 6 points within this post and gave some ideas for each one. So my outline for this blog post when I first started writing it looked like this:
As you can see, I left most of the outline in this blog post, WHICH YOU ARE ALLOWED TO DO! I let those 6 ideas become the headlines in this post which will make it easy to my audience to read. Your blog posts does not have to be complicated or extravagant. Be as simple and direct as you can.
Thanks so much for reading! Check out my website next week for more!
 Helping each other write better. Join us.
6 Things to do BEFORE You Write Your First Blog Post was originally published in The Writing Cooperative on Medium, where people are continuing the conversation by highlighting and responding to this story.
Read more: writingcooperative.com


